Data security in Google Drive with Data Loss Prevention
April 29, 2026In 2026, data privacy remains a huge concern for businesses worldwide, especially as cyber threats and breaches become more sophisticated. With new legislation and constantly evolving regulations, businesses are under increasing pressure to maintain compliance and protect sensitive information. Robust data security has never been more important.
Google Workspace offers a reliable solution to help businesses stay on top of this challenge. By providing administrators with powerful tools like Data Loss Prevention (DLP), Google enables businesses to protect the data they manage, process, and control with confidence. Implementing DLP rules within Google Workspace can help mitigate security risks and ensure compliance in today’s digital landscape.
What is Data Loss Prevention?
Google Workspace DLP (Data Loss Prevention) is software that detects potential data breaches and then goes on to prevent them by monitoring, blocking and detecting any further issues over time. By using DLP, administrators can create and apply rules to control what content users can share outside the organisation.
Data Loss Prevention software helps organisations prevent the accidental or intentional sharing or leaking of sensitive or confidential data, such as credit card numbers, personal identification numbers, financial information, and other personal data.
DLP can be set at different levels of the organisation. It can include actions such as;
- Blocking external file sharing
- Warning against external sharing
- Disabling non-editor download/print/copy permissions
- Applying specific drive labels
Any actions that trigger DLP rules will be registered in the security dashboard. Additionally, alerts can be sent to the admin alert centre for the administrator team, or non-admin users in your organisation can be notified by email.
How Does Data Loss Prevention Work?
As mentioned above, Data Loss Prevention is put in place to control what can and cannot be shared outside of your organisation. It identifies potential risks to organisational security and blocks them before they escalate.
As an overview, the Data Loss Prevention flow works as follows:
- Your business creates DLP rules. These rules will define which content is considered sensitive and, therefore, should be protected.
- DLP software then scans your content for potential DLP rule violations. If any are discovered, DLP enforces the rules you defined and triggers actions, such as blocking content from being viewed by users outside the organisation.
- DLP then notifies any admins or users you specify of rule violations.
How to Create a DLP Rule in Google Admin Console
We’re now going to walk you through how to create a DLP rule on the Google Workspace Admin Console. This can be done using the following steps:
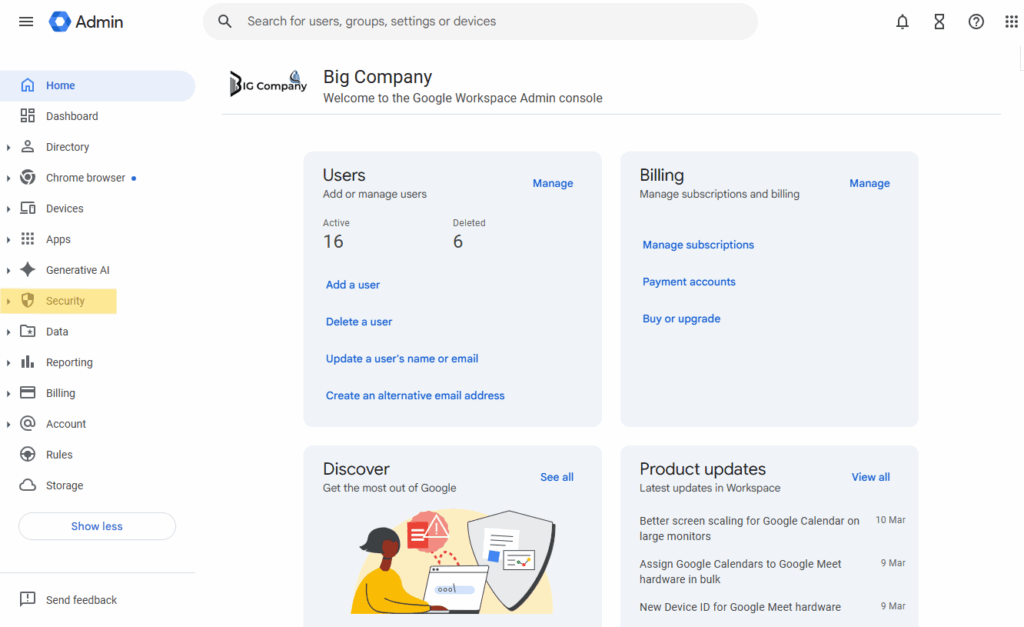
- Firstly, open up the Google Workspace Admin Console.
- Next, click on the Security heading on the left-hand side of the screen.
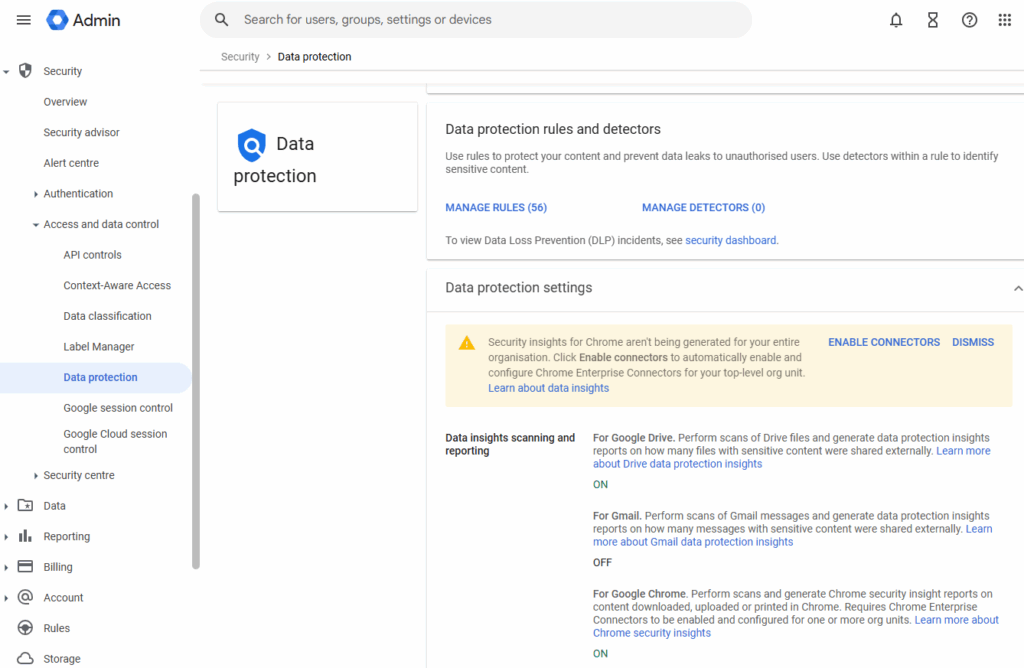
- When you select the Security heading, a dropdown menu will appear. From here, you should select Access and Data Control, and then click on Data Protection as shown below.
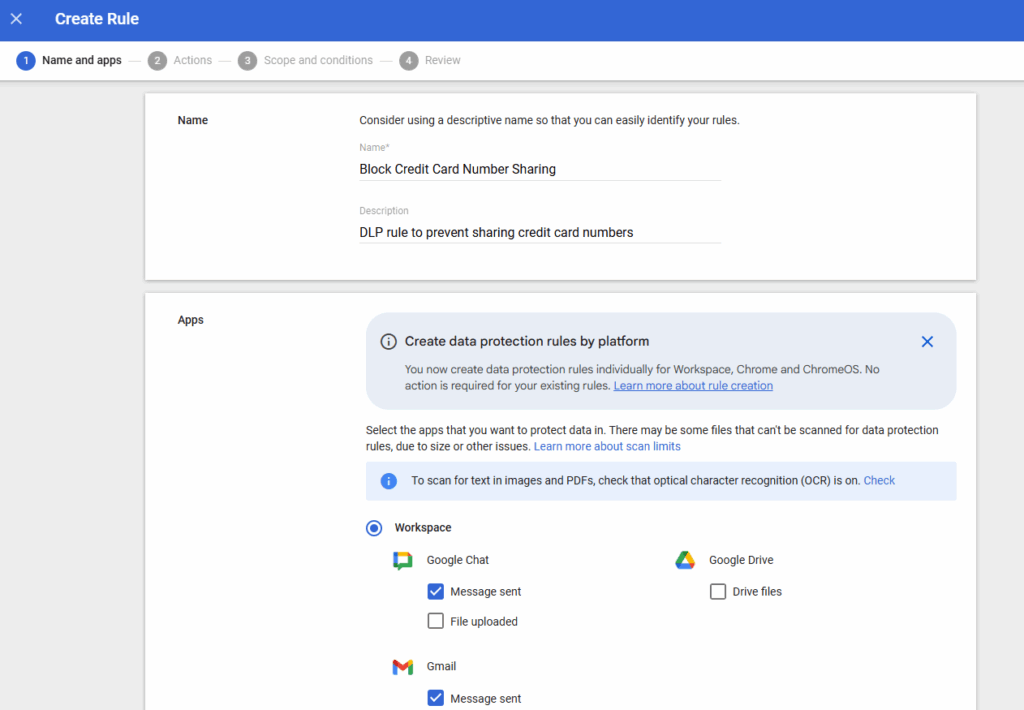
4. Once you have done this, select Manage Rules and from here, select Add Rule. Then select New Rule to add a rule which doesn’t currently exist in your Admin Console.
5. You will now be prompted to give your rule a name, as seen below in the Name section of the page. The name can be anything you like, but we would advise naming it something in relation to the rule you are creating.
6. Next, you will be asked to select which Apps you would like to apply your rules to. This can be Google Chat, Google Drive, Gmail, or Chrome. Once you have chosen one or more apps, select Continue to proceed
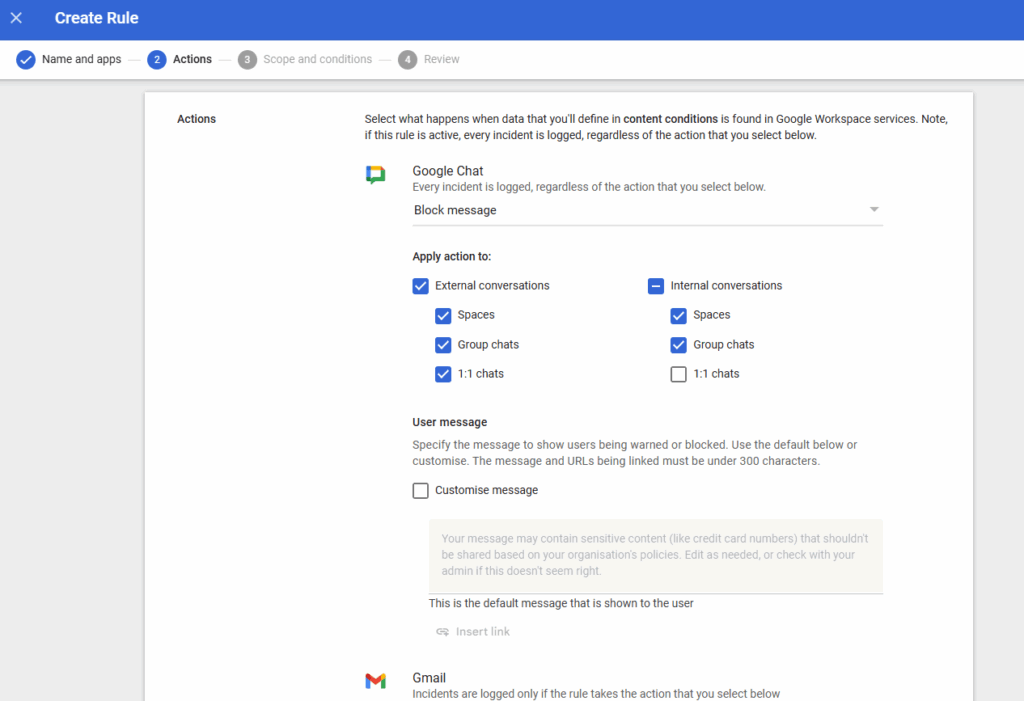
7. The following step looks at the Actions that you would like to be taken from these files when the rule has been triggered. We recommend selecting Block External Sharing to prevent potential leaks of private information outside of your organisation.
8. Once you’ve selected an appropriate action, choosing an Alert is next. This allows you to select the severity level of the alert that will be sent out should a rule be triggered. Here, you can also choose to select extra administrators who you would like to be alerted should a breach be identified.
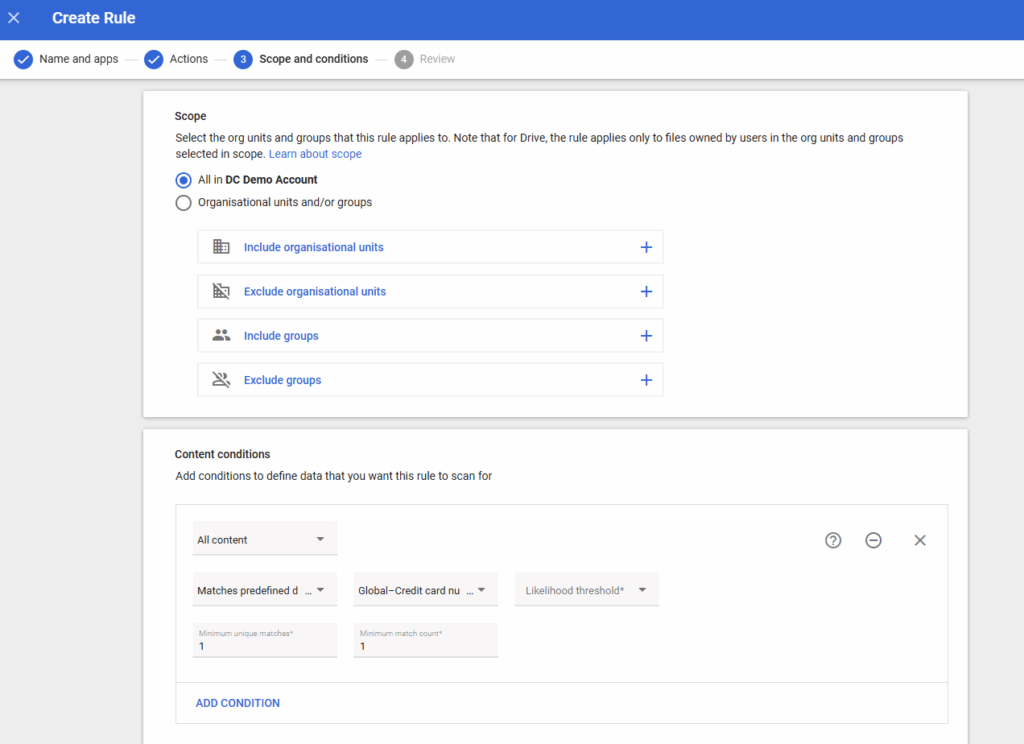
9. Next, look at the Scope section of the page. Here, you can select the users or groups that your rule will apply to. You can select everyone in your Google Admin account, or you can search for individuals if the rule should not apply to all users. When you are happy with your chosen groups, click Continue to proceed with the next section.
10. Following on from this, go to the Conditions section. This is where you will be able to add conditions to define the data you would like the rule to scan for. We recommend selecting All Content to ensure potential breaches are easily identified.
11. On the What To Scan For heading, we recommend selecting ‘Matches Predefined Data Type’.
12. In the Data Type field, you can define the type of data you would like your rule to identify. You can also select the likelihood threshold that this type of data will appear, which then causes your rule to identify and alert selected users of any potential breaches.
13. You will now be asked to select a Minimum Match Count. This refers to the amount of times a particular piece of data has been identified before an alert is triggered.
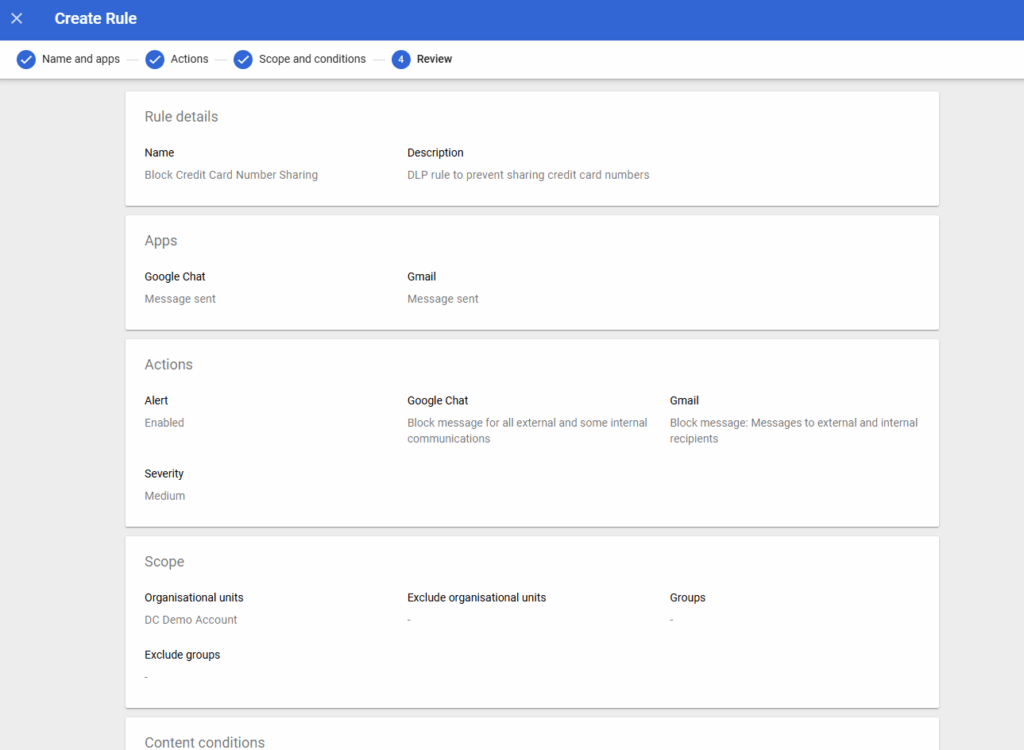
14. Lastly, you will be shown an overview of the rule you have just created to review all of the details before saving it to your Google Admin Console. Once you are happy with your choices, select the Create option at the bottom of the screen, and the rule will be enforced immediately.
Combining Data Loss Prevention Rules to Improve Security
Once you have created DLP rules in the Google Admin Console, they can be combined to protect sensitive data and strengthen your security position even further. For instance, an administrator can create two separate DLP rules, but they can have a knock-on effect on one another;
Rule 1 - Any document with sensitive information will automatically receive an ‘internal’ Drive Label.
Rule 2 - Any file that’s labelled ‘internal’ cannot be shared with someone outside of the organisation.
So, if you’re creating a new document and include sensitive information that’s covered by rule 1, the ‘internal’ label will appear. Then, if you were to try and add an external collaborator to the document, rule 2 will kick in, and a pop-up will appear, preventing you from doing so.
By working together, these DLP rules help prevent the sharing of sensitive data, even if it’s not at the forefront of your mind, so accidents are much less likely to happen.
How Does DLP for Google Workspace Impact the End User?
For general Google Workspace users across your organisation, the DLP rules that administrators create will help prevent data loss, whether accidental or intentional. The pop-ups that appear when you try to share a file containing sensitive information with an external email address help ensure data is protected in real time, regardless of the situation.
On some occasions, you may need to share files with external collaborators, and Google DLP rules may seem frustrating. However, they’re designed to detect sensitive data and prevent it from getting into the wrong hands. There is a workaround: simply delete the confidential information within the file you’d like to share, and you will be able to share externally as usual.
Final Thoughts On Data Loss Prevention
When administrators know how Google Workspace Data Loss Prevention works, they can start creating new rules that help ensure your organisation’s data remains safe and secure. DLP can be an incredibly powerful tool in your Workspace environment, and it’s never too late to implement it to support ongoing compliance.
As always, we want to hear from you. Is Data Loss Prevention something your business has considered before? And will you be adding this to your Google Admin Console? Get in touch for more information on how we can help your business with all things Google Workspace related.