How To Create Filters On Gmail
June 9, 2022In this week’s video, Damson Cloud’s Charlotte Moore will be taking us through how to set up filters on your Gmail account.
The introduction of this feature will be extremely helpful in improving productivity by keeping your inbox organised. An organised inbox makes it easier to find emails and details quickly.
So, if you’re interested in learning more about creating filters on your Gmail account, stay tuned!
How Do I Create Filters On Gmail?
We’re now going to go through how to create filters on your Gmail account step-by-step:
- Firstly, we’re going to open up our Gmail inbox
- From the sidebar, we’re going to open up the Google Workspace label. If you don’t have labels in your Gmail inbox, we recommend staying in your main inbox for the next steps
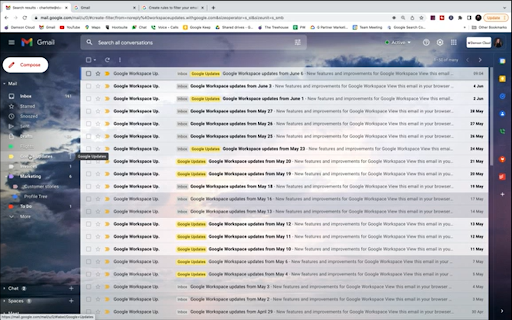
3. As you can see on screen, most of the emails in the Google Workspace folder have been labelled ‘Google Updates’. A shortcut for labelling these emails all at once as they appear in your inbox is to create a filter
4. Go to the search bar at the top of your Gmail inbox and select ‘show search options’
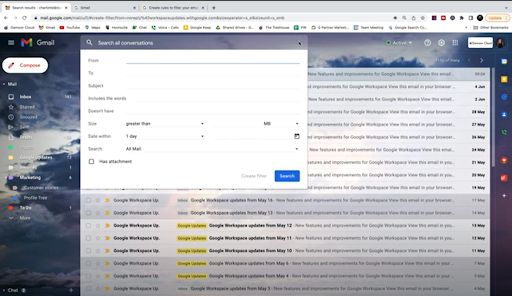
5. The ‘show search options’ field allows you to carry out advanced search options as well as creating filters for your Gmail inbox
6. In the ‘From’ field shown below, we’re going to enter the email address of the user we want to create the filter for. For example, if you want to create a filter for a certain business or client, type their email address into this field to begin creating a filter
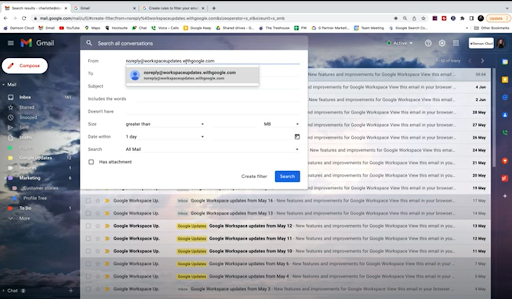
7. Some of the options shown in the fields above are more specific to an advanced search, for example the ‘Subject’ and ‘Includes the words’ headings. In this case, we’re going to create our filter using the ‘From’ heading only
8. Select ‘Create Filter’
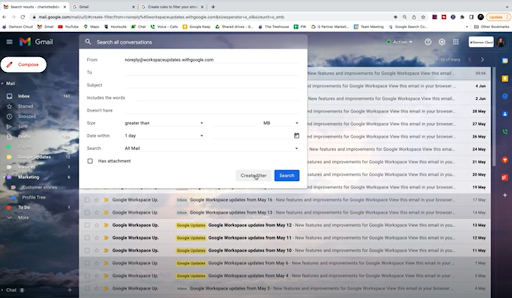
9. A list of tick-box options should now appear. These will give you a selection of options on what you would like to do to the filtered emails in your Gmail inbox. These include archiving the email as soon as it arrives in your inbox, marking the email as read or deleting the email
10. Here we’re going to select ‘Skip the Inbox (archive it)’ and ‘Apply the label: Google Updates’. This means whenever an email from the listed email addresses comes in, it will automatically be archived into the Google Updates folder rather than stored in the general inbox tab.
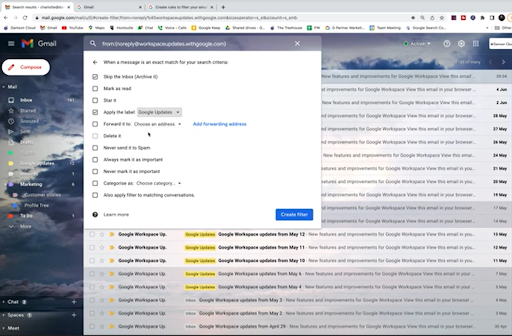
11. When you have selected the options you would like to add, select ‘Create Filter’ to turn the filter on
12. To see which filters are active in your Gmail inbox, select ‘Quick Settings’ then choose ‘See All Settings’ and select ‘Filters and Blocked Addresses’ at the top of the navigation bar
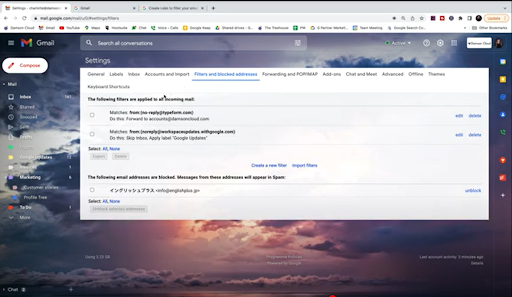
13. In this field you can also edit and delete any filters you no longer need or want to use
How Can I Export Filters On Gmail?
We’re now going to go through how to export a filter step-by-step:
- In your Gmail inbox, select ‘Quick Settings’ and then choose ‘See All Settings’. From here, select ‘Filters and Blocked Addresses’ at the top of the navigation bar
- To export your filters, select the filter by tapping the tick box and then select ‘Export’
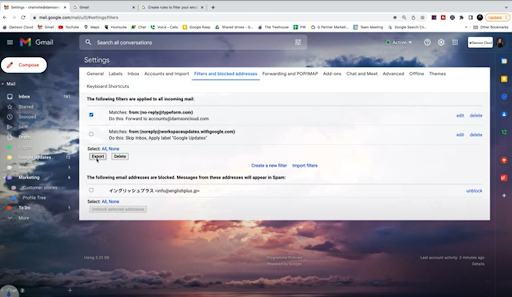
3. This will now download your filter as an XML file. From here, you will be able to edit your filter in a text editor document
Final Thoughts About Filters On Gmail
We hope you enjoyed this week’s update on how to create, edit and export filters on Gmail. This feature is extremely useful in keeping your inbox organised and streamlining selected emails into their folders without having to do this manually.
As always we want to hear from you- are filters on your Gmail inbox something you would use daily? Let us know in the comments!
If Gmail filters or Google Workspace are factors you or your business are interested in or want to learn more about, please feel free to contact us and one of our team will be happy to help you with your inquiry.
As a longstanding member of the Google Cloud Partner Program, Damson Cloud specialises in bringing people and ideas together through new ways of working. We champion the very best practices in remote working and change management, helping companies and their teams collaborate productively from anywhere in the world. To find out more about our services, check out our library of tutorial videos or our blog.