How To Schedule Appointments On Google Calendar
April 14, 2022In this week’s video, Damson Cloud CEO Fintan Murphy discusses the new feature on Google Workspace which allows people to schedule appointments into your calendar.
The introduction of this feature as part of the Google Workspace is extremely helpful and something customers have been interested in and have been requesting for a while!
How To Enable The Appointment Scheduling Feature On Your Google Calendar
The introduction of sharable links to book appointments in your Google calendar removes the constant emailing back and forth between customers and your business when trying to plan a meeting.
Before we jump in and look at how to use the feature, we first need to enable it on your calendar.
We will now go through how to enable it step by step:
- Open your Google Calendar
- Scroll down until you see Appointment Schedules
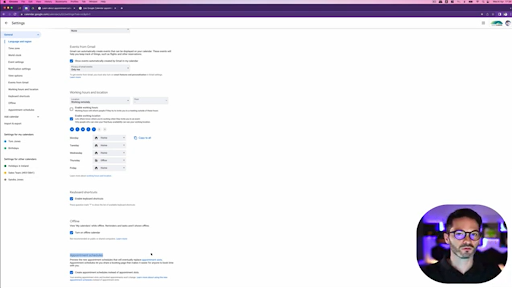
A point to note here is you may have heard or seen the phrase ‘Appointment Slots’ used on Google Calendar before.
This is an old feature that is being replaced by ‘Appointment Schedules’ which gives the user more flexibility, as they can book appointments into your calendar themselves using the shareable link.
Something else to note here is that the user does not have to use Google Calendar themselves to book an appointment.
3. Next, tick the highlighted box that says ‘Create appointment schedule and set up appointment slots’
4. Once you tick the box, the feature is now enabled
How The Appointment Scheduling Feature Works on Google Calendar
5. To see how appointment scheduling works on your Google Calendar, highlight your working hours (for example, 9:00am to 5:00pm as we have highlighted here).
6. Once you have selected a time frame, a box appears asking you to add a title.
Here you will see a range of options, from ‘Out of Office’ to ‘Task Reminders’. We are going to select, ‘Appointment Schedule’ on this occasion.
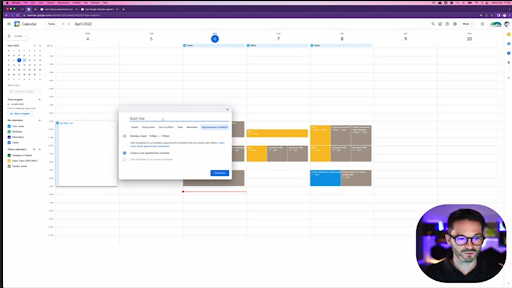
7. Now, it’s time to give your appointment slot a name. We’ve chosen ‘Sales Call Meetings’ so the slots are easily identifiable to your clients making the booking. Once you are happy with the name you’ve chosen, press Continue
8. You will now have the option to add in other days you are available for these meetings:
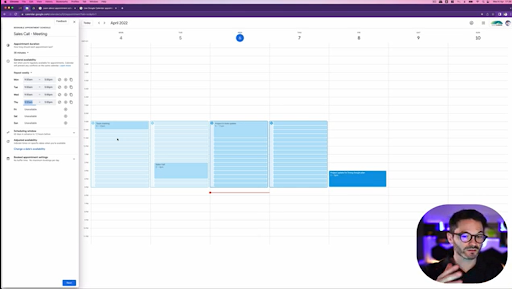
Here, you can select the length of the appointment and customise this for each individual day to fit into your schedule.
For example, if you finish at four o’clock on a Thursday to hit the gym after work, this can be reflected in your calendar to guarantee no meetings are scheduled after this time.
9. The schedule window can be set at this point, which is the time range of your meeting slots.
Here, you can select the start and end date for your meetings and the minimum and maximum time in advance an appointment needs to be booked in.
10. Next, you can adjust your availability dates to reflect any holidays or upcoming days off to prevent any potential scheduling conflicts:
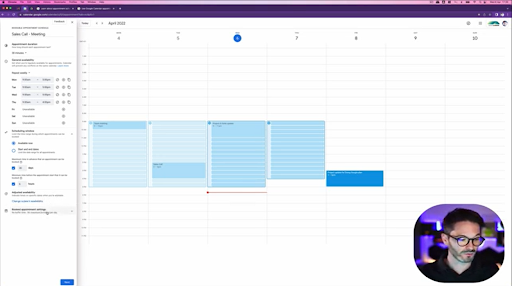
11. We then have Appointment Settings, which has some great features such as setting a buffer time between appointments to avoid back to back meetings.
A maximum number of bookings per day can also be selected here to guarantee you won’t be overbooked on any given day the appointment slots are available.
12. Click next to save your settings.
13. You can now go back and change the name of your appointment slot and add a photo to your appointment booking page - a nice feature for some added personalisation.
14. A location for your appointments can be added here as well as a description for the meeting agenda.
15. We then have the booking form which is defaulted to request a first name, last name and an email address but additional fields can be added in to gather further information from the booking party, such as a contact number or job title.
16. Next, you can set reminders for your appointment slots.
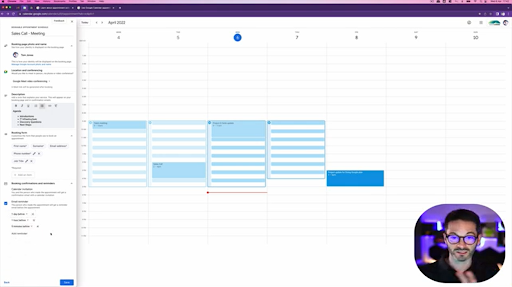
17. Once you’re happy with the reminders you have set, click save.
This will then take you through to the booking slot you have just created for your Sales Calls Meetings. At this stage, a link is shown which takes you through to the booking page.
18. Below, we can see what the booking page looks like for the end user. They can easily book their meeting with minimal inconvenience and are prompted to enter the details chosen earlier including a name, email address and contact number.
Once these details have been entered, hit the ‘Book’ button to confirm the meeting.
An email will then be sent to the recipients to confirm the date and time.
Final Thoughts On Google Calendar’s Appointment Scheduling Feature
That wraps up our rundown on the new Google Calendar feature which allows users to share a link with others to schedule an appointment.
The introduction of the shareable link will make managing your calendar much easier for Google Workspace users and reduce the need for emails or calls back and forth to agree on dates and times for meetings.
Limitations
It's worth noting that when creating an event, appointment scheduling isn't an option when you are in month view.
It is also only possible to add one custom field.
We’d love to hear your thoughts on the appointment scheduling update - is this a new feature you can’t wait to use? Let us know in the comments!
As a longstanding member of the Google Cloud Partner Program, Damson Cloud specialises in bringing people and ideas together through new ways of working. We champion the very best practices in remote working and change management, helping companies and their teams