Grouped Management On Google Admin Console
September 15, 2022In this week’s video update, Damson Cloud’s Mark Fraher will be talking us through Grouped Management on Google Admin Console.
In this video, we will be covering:
- Set organisational-wide policies for using groups
- Create a group and configure group settings
- Add users to a group individually and bulk via CSV
- Removing users from a group
- Giving a group an additional “alias” address
- Assigning roles to group members
- Adding a group to another group
- Adding all of your organisation’s users to a group
So, if you’re interested in learning some tips and tricks about grouped management on Google Admin Console, stay tuned!
How Are Google Groups Used?
You may be wondering, how exactly are Google Groups used? They can be used in the following ways:
- To communicate and collaborate (including email lists)
- Sending communications such as emails to all group members using a single address
- Inviting group members to a meeting
- Sharing content with group members such as documents, sites, videos and calendars
- Participate in group discussions or a collaborative inbox at groups.google.com
In this video we are going to teach you how to manage their settings in the Admin Console.
How To Set Up Groups On Google Admin Console
As an administrator on Google Admin Console, you are able to set organisation-wide options which control who can access, create and participate in group activity.
For example, you may decide that only admin users can create groups in your organisation or perhaps, you’d rather users or external customers had the ability to create groups within your organisation as and when they want?
No matter what options you choose, group addresses will still appear as suggestions when you type in an email address on your Google Calendar or in the recipient box for an email on Gmail.
Setting Up Organisational Wide Policies On Google Admin Console
We’re now going to look at how to set up organisational wide policies on Google Admin Console. To do this, you should:
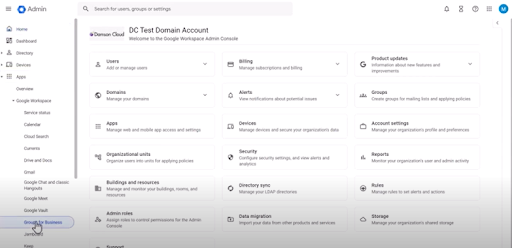
- Click on the ‘Apps’ heading on the left-hand side of the screen
- Then, click on the ‘Groups for Business’ heading as shown below
3. Here, you’ll have the option to check your sharing settings
4. For the first option, ‘Accessing groups from outside the organisation’, we recommend selecting the second option which is ‘Private’ to ensure your groups remain secure
5. The next section looks at Creating Groups. Here, you can choose who in your organisation you will give permission to create new groups. You can choose admins, normal users or external customers, however this option is only available if you selected ‘anyone on the internet’ for the option above
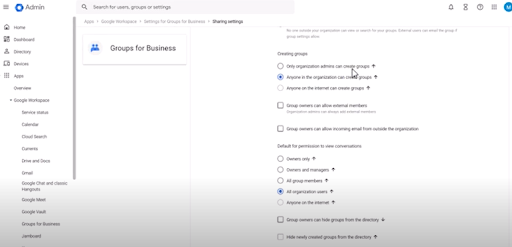
6. The next points look at allowing external users to join organisational groups and allowing incoming emails to be received from outside of the group. Both of these options are unticked by default
7. The next option reviews the ‘Permission To View Conversations’. Here you can select whether you would like all group members, owners and managers, owners only or anyone on the internet to be able to view your group conversations
8. Lastly, you can select if you would like your group to be hidden from the directory or if you would like new groups to be hidden from the directory
Creating Groups On Google Admin Console
To create a group on Google Admin Console, you should:
- Select the ‘Directory’ heading on the left hand side of the screen on the navigation bar
- From here, select the ‘Groups’ heading
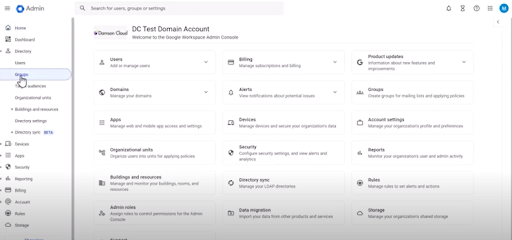
- Next, select ‘Create group’
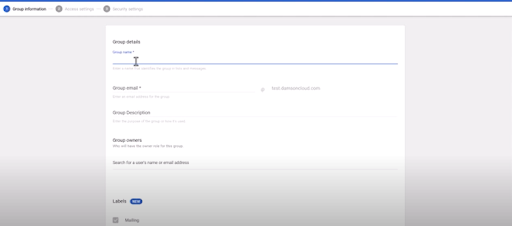
- The following page will allow you to enter the details of your group such as a group name, description, group owners and a label for your group
- The next page you will be taken to will review the Access Settings of the new group. At the top of the page, you will see the pre-defined access settings.
- Here, you can choose from setting your group access settings to public, team, announcement only, restricted or custom. We recommend selecting Public- this means anyone within your organisation can post in and join your group.
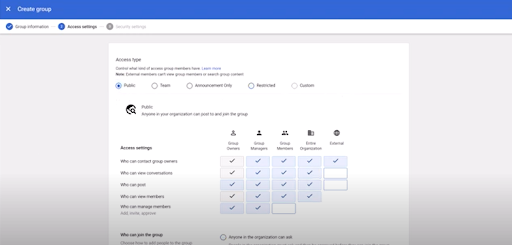
- You can then customise your access settings in the check boxes shown above. These boxes allow you to review options such as who can view your conversations, who can contact group owners and who can view members to name a few.
- Below this, the next section looks at who can join a group. Here, you can select from the following options: anyone within the organisation can ask, anyone within the organisation can join or you can choose to make your group invite only.
- Click next when you are happy with your choices.
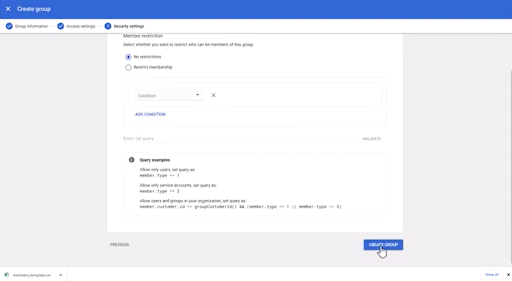
- If you have an Enterprise account, the next section will look at Member Restrictions which will allow you to restrict who is allowed to join your group
- Once you have done this, you can now create your group.
How To Add People Into A Group On Google Admin Console
To add members to your group, you will need to do the following:
- Click on the ‘Group’ heading on the left-hand side navigation bar. Once you have done this, click on the name of your group
- Click ‘Add Members’
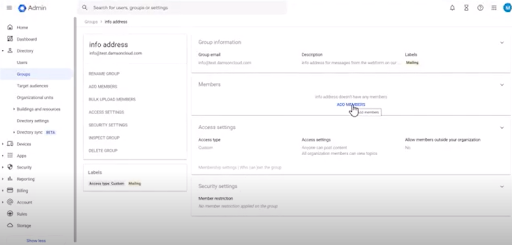
This will open a pop-up window which allows you to search for a user's email address in order to add them to the group. Once you have entered the user’s email address, click ‘Add to group’ to finalise your choice
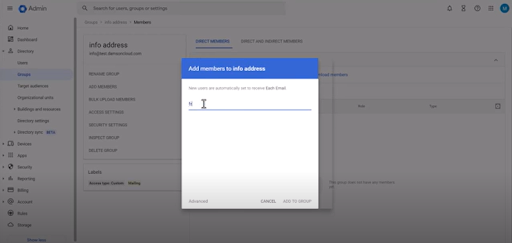
- The new user will then appear in the list of members for your group
How To Bulk Upload Users To A Group On Google Admin Console
We’re now going to review how to bulk upload users to a group. To do this, you should:
- Click on the ‘Group’ heading on the left-hand side navigation bar. From here, click on ‘Upload members’
- A pop-up will now appear asking you to upload a CSV file to bulk upload members to your group. It also gives you the option to download a blank CSV file which you can edit in either Microsoft Excel or on Google Sheets
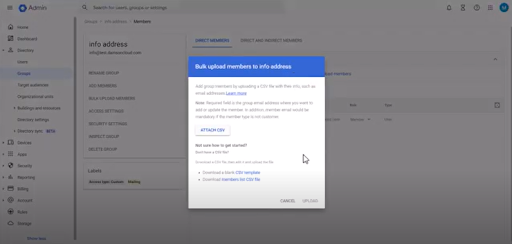
Please note: The maximum CSV file size that can be uploaded is 35MB.
- Check out our video to see how to fill out the CSV file to bulk upload users to your group on Google Admin Console
- Once you are happy with your CSV file, download the document to your device and select the ‘Attach CSV’ button as shown in the pop-out window above and select upload. The users listed in your CSV file will now be uploaded to your group
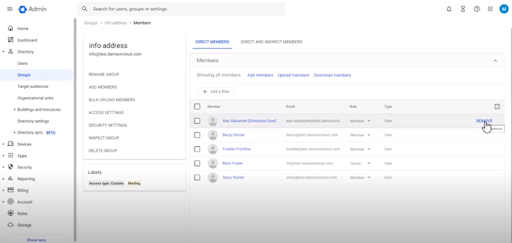
Removing Members From A Group On Google Admin Console
If you would like to remove a member from a group, hover over the user’s name and select the Remove option as shown below
Interested In Learning More About Grouped Management On Google Admin Console?
For a more in depth review of grouped management on Google Admin Console and for a video walkthrough on the following points, why not check out our accompanying YouTube video, where we review all of the points above as well as:
- Giving a group an additional “alias” address
- Assigning roles to group members
- Adding a group to another group
- Adding all of your organisation’s users to a group
Final Thoughts On Groups Management In The Google Admin Console
We hope you enjoyed this week’s video update on how to manage groups in the Google Admin Console.
As always, we want to hear from you- is your organisation using Google Groups? Will this video encourage you to start if you are not? Let us know in the comments or contact us for more information on Google Workspace solutions for your business.
As a longstanding member of the Google Cloud Partner Program, Damson Cloud specialises in bringing people and ideas together through new ways of working. We champion the very best practices in remote working and change management, helping companies and their teams collaborate productively from anywhere in the world. To find out more about our services, check out our library of tutorial videos or our blog.