Master appointments in Google Calendar
February 9, 2023Master appointments in Google Calendar
Whether you’re new to Workspace or you’ve been using it for some time, there’s no doubt you’ll have seen or used Google Calendar. It’s a Workspace app that has been improved over time to now rival and better the other calendar apps on the market right now. As there has been new functionality rolled out recently, we thought it would be a good time to go through Google Calendar again. Fintan spoke about the new features that “killed” Calendly back in April 2022 and the new functionality just serves to improve the interface and its functionality.
Key takeaways from this video:
- Who can use appointment scheduling
- Selecting appointment slot or schedule
- How to create a scheduled appointment
- How to share the schedule
- Edits post booking
Who can use appointment scheduling?
It’s important to mention that these features are not available on free workspace plans or accounts. They’re only available to those on a paid plan on Google Workspace. These include Workspace Individual, Business Standard and Above, Enterprise and Education accounts. Within these account types Appointment Slots are the default selection, however appointment schedules can be turned on. These will eventually replace appointment slots but there’s no date just yet for when the switch to appointment schedules will be made. Right now, old appointment slots and new appointment schedules can co-exist on your calendar. Meaning you can switch between the old appointment slots and the new appointment schedules at any time. Any previously created slots or schedules remain active and available whether appointment schedules are turned on or off.
Sales teams are all over this function for Client outreach. This allows a client to self-schedule a sales call, a product demo or provide bookable viewings for your property, office space, or showroom.
However the tool can continue to be useful beyond the sales desks. You can employ these for services scheduling. Support teams can offer office hours for external clients or internal team members. You can also offer bookable training sessions for one to ones/teams, or allow sign up to gym inductions too.
You can also use the function in education and commercial settings to schedule parent teacher meetings, manage recruitment open day screening sessions or manage access to senior management in pitch to the boss, dragons dens or whatever you call your innovation generation sessions. This is a great non-financial benefit idea.
Management and HR teams should be using this function as much as the sales teams for performance reviews, benefit briefings, new starter on-boarding and exit interviews.
There’s no better way to increase team buy in than to give your team ownership and autonomy over their meetings with you. Let them set the time, it’s one less job for you!

Selecting appointment slot or schedule
If you are business standard and above user you have the option of using both Appointment slots and Appointment schedules.
Why Appointment Slots?
- Ability to add a guest to all slots which automatically adds them to any booked appointments
- Set up appointments on Group Calendars and calendars you have edit rights to
- The ability to pre-reserve a conference or meeting room for your appointment
- Appointment slots can be found as the default from Business starter up
The appointment slots feature can be accessed from the create menu, or by select the time slots in your calendar.

Choose the Appointment slots tab. Then add your title and select a single slot or slot duration and the slot length in minutes. Appointment slots will allow you to make slots available for your own calendar, shared calendars and even calendars you manage. At this point you can save the appointment slot or you can access more options to add further details to this appointment. In the more options you get all the functionality you would usually have in a calendar appointment. From here you’re able to;
- Create repeating slots monthly weekly, yearly or in a custom repetition
- Add a message to the calendar entry that will be created
- Pre book a room
- Add a collaborator to all the appointment slots who will be automatically included in the booking when created
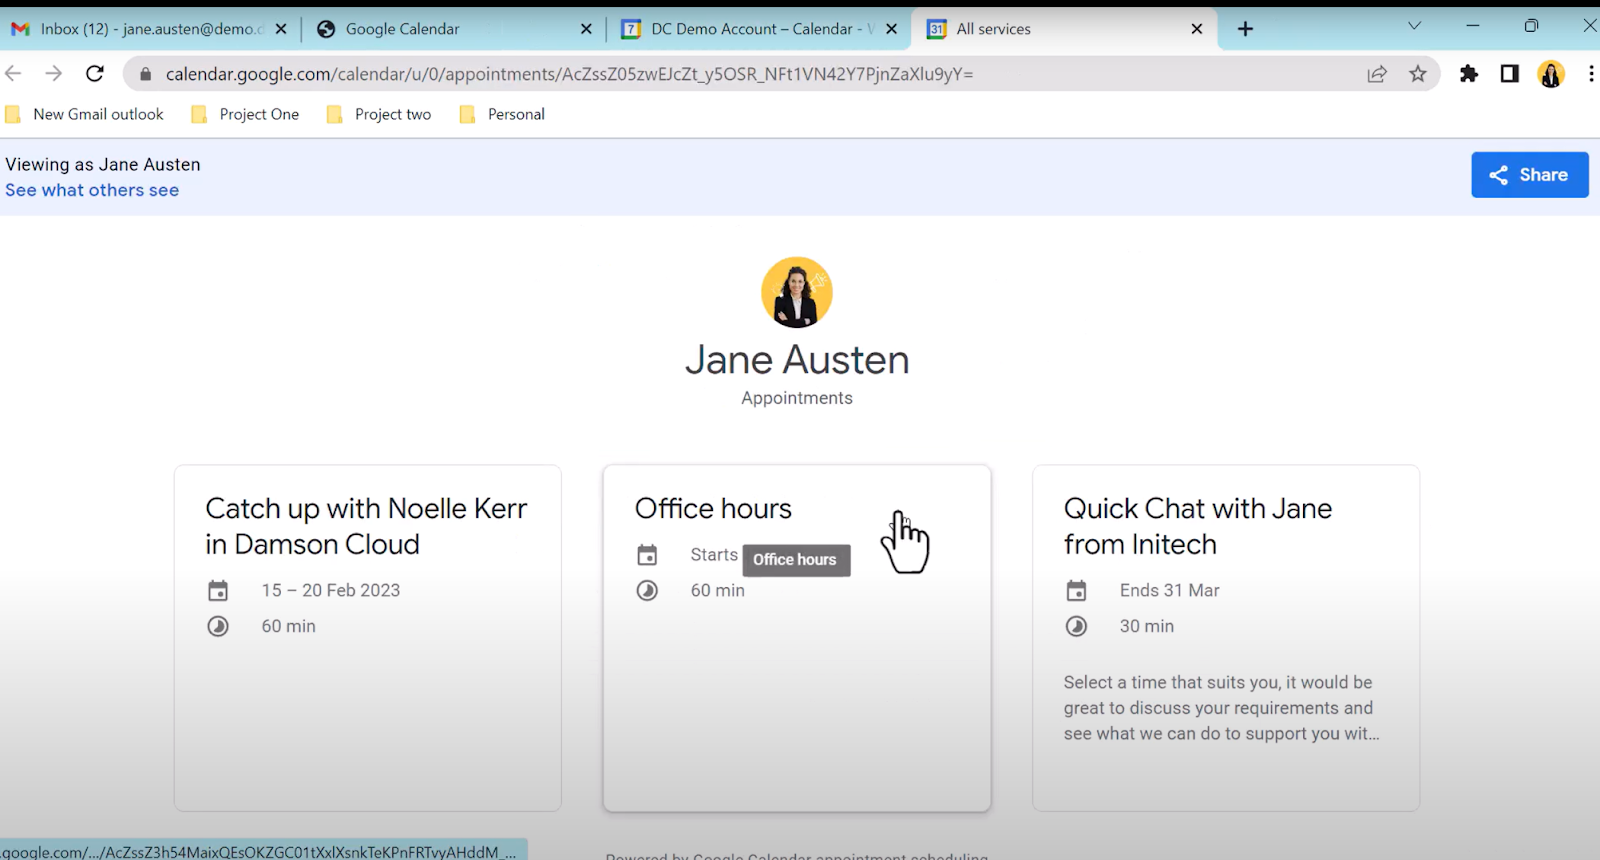
Once saved you can access the appointments page created and share the link to users. It’s important to remember your user needs to sign into their Google account to access the appointment page. Once in they can view the slots available this week or navigate to later dates. Once the date and time are selected, Google will auto fill the attendee name from their Google profile. And after clicking save a confirmation pop up will then appear. You can then go to the appointment page for the calendar to view the slots you have created.

Why appointment schedules?
Appointment schedules offer a slicker looking client booking page. In addition the page can provide multiple booking schedules if required. You can make your booking page available to anyone, so there is no need to have a Google account. You can also add in customisable booking fields to collect further required information. Manage your bookings frequency and add buffers between appointments. There is functionality built in to automatically add meeting details to a booking, specify the meeting location, request a phone number or leave it unspecified.
Appointment schedules also allow you to create highly specific repeat schedules and make exceptions for one off days in a repeated block. Schedules will auto update to avoid conflicting events you have RSVP’d “yes” or “maybe” to in your personal calendar.

How to create a scheduled appointment
To begin to use the appointment schedule feature you may need to turn it on so access settings and select Appointment schedules from the Left hand menu. Tick the box to turn on the schedule functionality and you are ready to create your schedule.

Create the schedule
Firstly choose the time period in which your schedule will be created and select the Appointment schedules tab, the first pop up will offer you the option to create a new appointment schedule or add to an existing schedule, click create new and continue. The pop up will now dock to the left hand side of the screen and the options will become available.

To begin, give your schedule a name (you will have a description field shortly but make it clear for your user to understand from the title in their calendar). Next set the duration of your appointments from 15 mins to 2 hours or use the custom time set. The schedule will default to a weekly repeat which can be switched off. Use the general availability section to enter your available time period. The function allows the periods to be split through the day to factor in lunch breaks and focus time, in addition you can set schedules in different time zones if your target audience is based in another region.
The scheduling window allows you to set a start date for your appointment schedule (useful if you want to give advance notice of “first come first served” sessions like C-suite appointments or parent teacher meetings). Conversely you can put an end date for sessions that occur for a finite period of time such as annual reviews. Limit how far in advance your sessions can be booked to manage your time including a minimum period to ensure that you have sufficient prep time for your meeting; these can be increased or decreased with the arrows or simply type into the box.
Adjusted availability allows for adjustments to specific days, so we can change the availability from 2pm to 5pm. This means people will not be able to schedule anything in this time slot.
The booked appointment settings feature has important controls to help manage your day whilst giving the most availability to users. While we want users to know they can book any free time in a day we also don’t want to end up with back to back meetings from the start of the day to the end of the day in most cases. We will use the buffer time feature to ensure we have time to overrun slightly or take a comfort break between meetings. In addition you can add a maximum number of bookings that you’re prepared to take within a given timeframe. If you know that you max out mentally after 5 reviews you can ask Google Calendar to auto close appointments for that day once you hit your limit of 5 bookings. Lastly you can colour code times set aside for appointments so that these jump out in the calendar for accessibility. Save these changes and we move onto what the end user will see:
Firstly preview your photo and name, next select the format of your meeting; will you need a meet link? Will you be in person? (here you can specify a location, but not book a room resource), phone call? (the booking form will require the user to add a phone number) or you can specify later - meet details and location can be added post booking. The description allows you to add a note at the top of your booking page to describe your session; this will appear in the description field of your calendar invite. Then you can use the booking form to add fields for completion upon booking the appointment. First name, surname and Email address are obligatory, you can add up to 6 custom fields and make these optional or required too. In addition you can set email verification if using externally to confirm the user's email is legitimate.
As standard you and the booker will receive an invite to the appointment. You can set reminders to send to the booker in advance of your session - up to 5 reminders can be scheduled, reminders can be sent from 4 weeks out to 1 minute before (email only at this stage however).
How to share your schedule
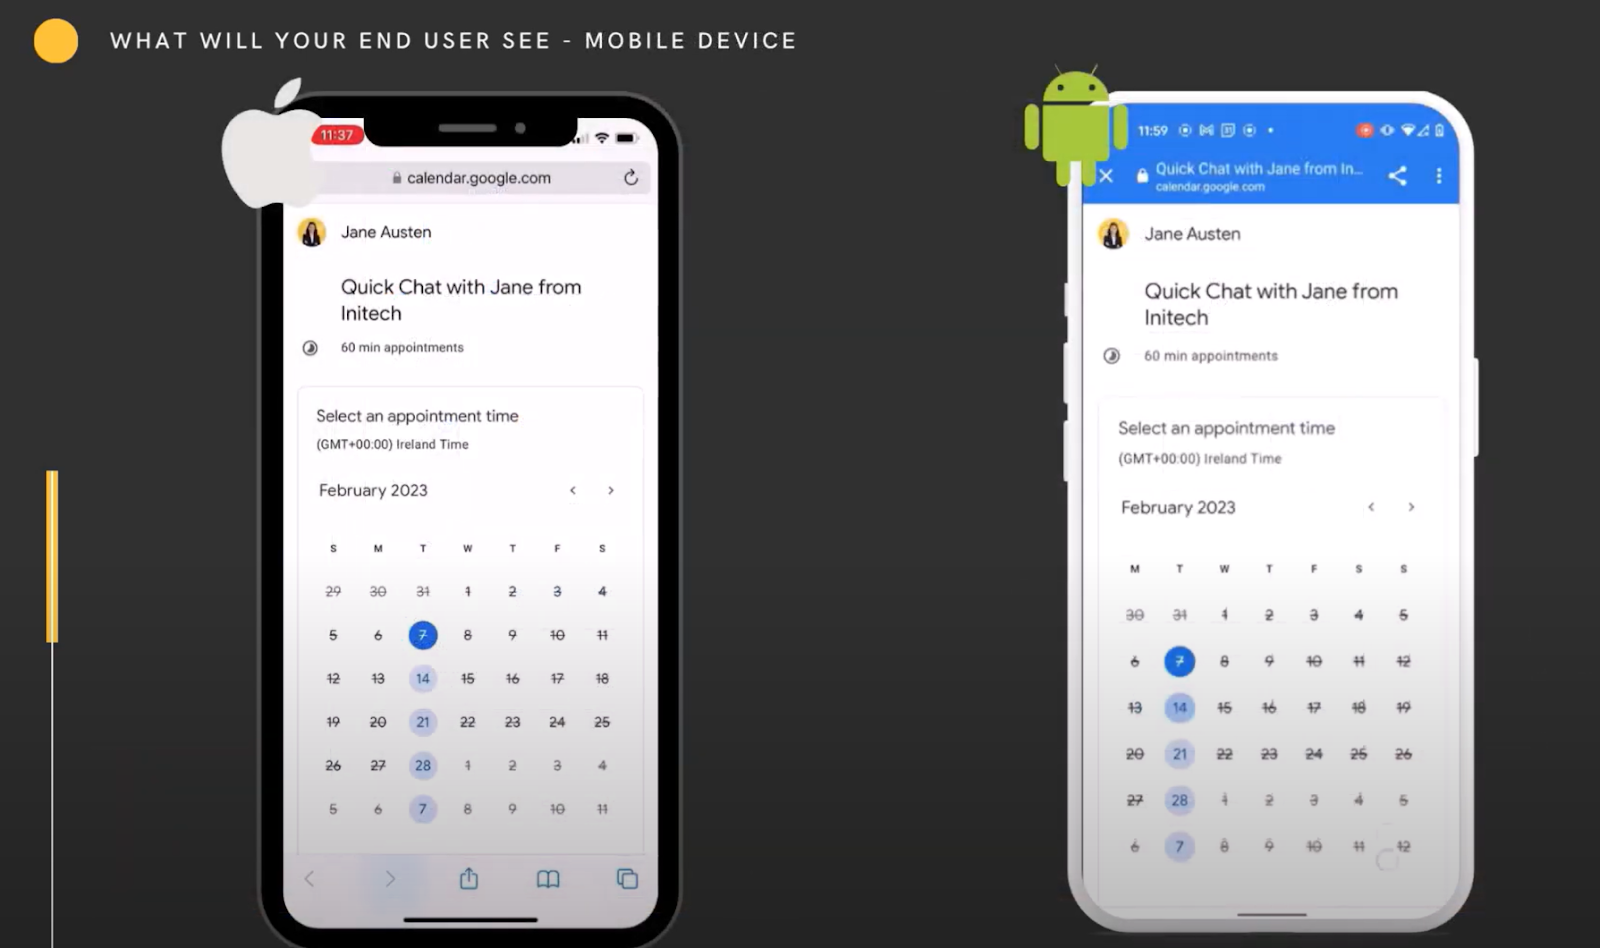
You are able to share your schedule by link or embed in your website, in each case you can choose to show one appointment schedule or a page with all available appointment schedules for your calendar. In a browser, your user will see a much more usable booking page showing slots and mini calendar to navigate. The booking form pops out on selection and the booking will not complete until all required fields are filled. Then you’ll see a confirmation pop up that gives details and a cancellation option and the booking will appear in the bookers calendar. On a mobile device the Iphone and android experience is similar with a mini calendar to select dates and a clickable time slot.
Once the booking is complete you will receive an email with the Calendar invite, the invite will have an auto RSVP ‘yes’ and will appear in your calendar. For colleagues viewing your calendar the appointment schedule is not visible until a booking is completed then that specific slot will appear as an event.
This week Google is rolling out an update to allow you to check availability not only in your primary calendar but across multiple calendars. This feature started rollout on Jan 7th and could take up to 15 days for visibility in your calendar application. This will allow you to review multiple calendars for conflict in addition to your personal calendar, including calendars you own, calendars you manage or calendars you are subscribed to, If you RSVP “Yes” or “Maybe” to an event in your primary calendar or have any busy event on a selected secondary calendar, that block of time won’t appear as open on your booking page, which is an improvement in group scheduling, here is where you will find this functionality when it goes live in your region:

Now, there are some limitations here, you cannot deselect the personal calendar when using this function and this function will only check the additional calendar for conflicts; it will not add that calendar as a guest to the resulting bookings so you will need to do this manually at this stage.
Edits Post Booking
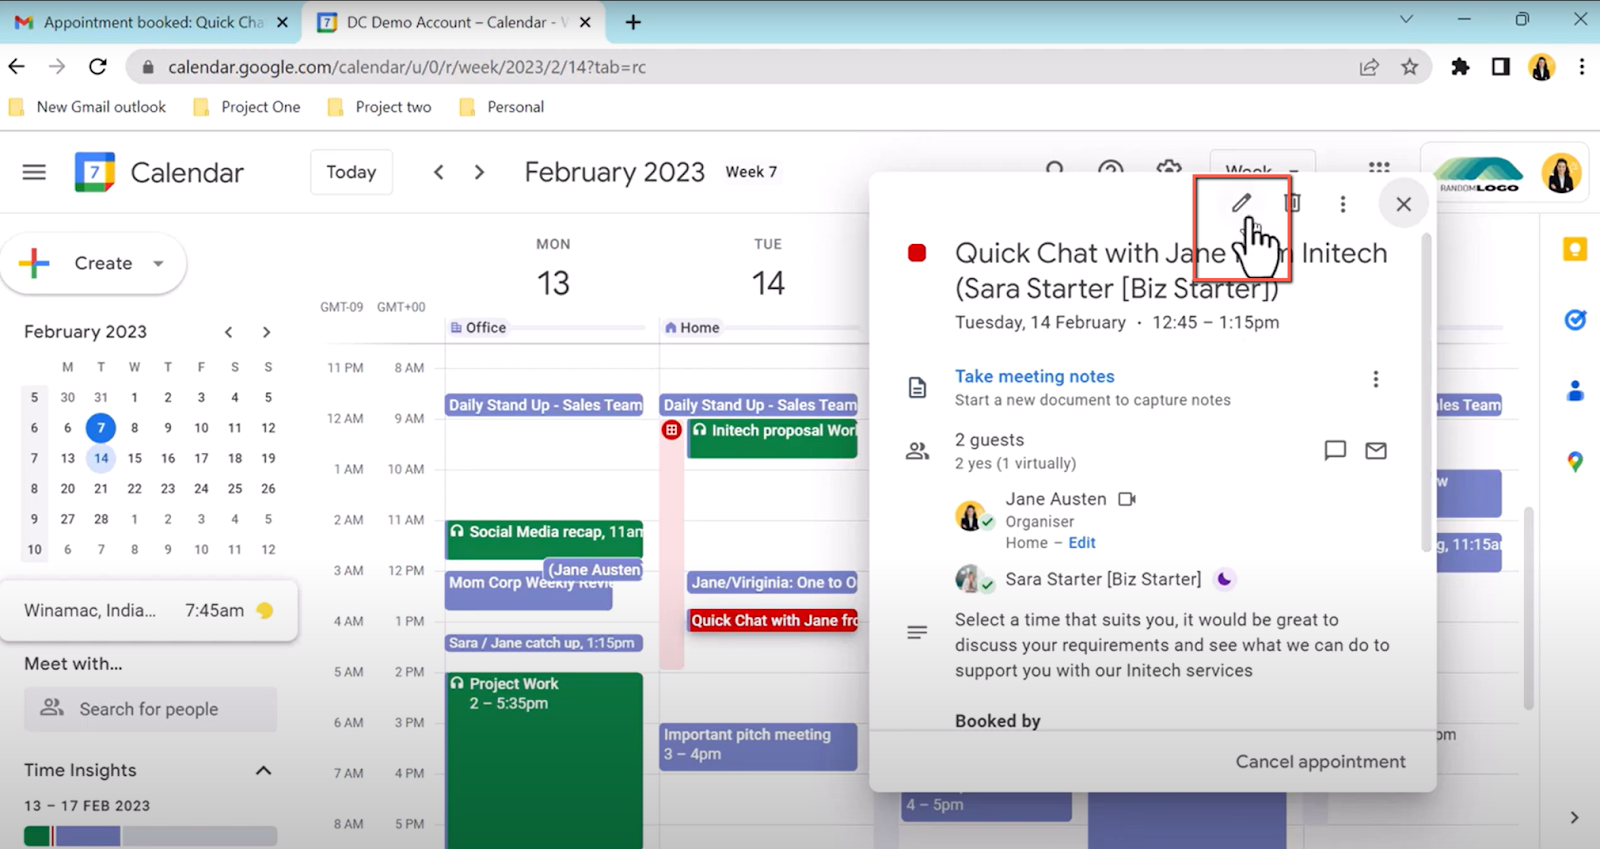
Once your attendees have booked appointments in your schedule you can customise the event. Access the event edit pop up and here you can amend times if required and create a repeating event. You can add conferencing facilities (including Zoom if you use the addon). And change visibility on your appointment. Add more information to the description as required and add guests (the find a time function will help you to find an available colleague). If you meeting is now face to face you can add a meeting room resource for this appointment. All of this information can be found in the edit icon.
If you need to remove an appointment schedule you can access the delete icon on the top right hand side of the pop up. A further pop out will ask you to confirm if you wish to delete this week only or all availability on this schedule. Once the schedule is deleted it will disappear from your calendar and the book page you have provided will cease to work. However any bookings created from the schedule will remain as events in your calendar. And that’s it! You’ve successfully learned about the appointment scheduling feature.
As always, we want to hear from you. Are you using appointment slots or appointment Schedules in Google Calendar? Let us know in the comments on our YouTube channel or contact us for more information here if you want to learn more or utilise the full power of Google Workspace.
As a longstanding member of the Google Cloud Partner Program, Damson Cloud specialises in bringing people and ideas together through new ways of working. We champion the very best practices in remote working and change management, helping companies and their teams collaborate productively from anywhere in the world. To find out more about our services, check out our library of tutorial videos or our blog.